Tutorials
- If you already have an account, click on any tab on the top menu, and you will be asked to login before accessing any page on the portal.
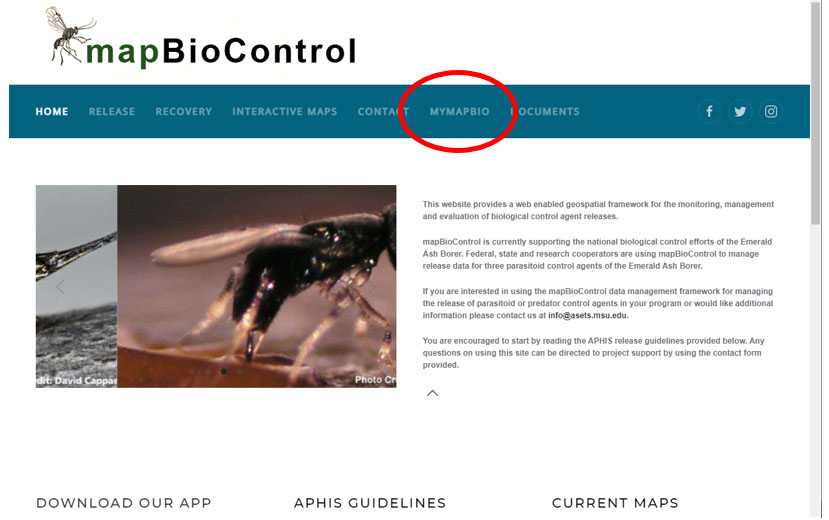
- If you do not have an account, click on the MyMapBio tab (click here to see image ) and fill out the required information. Once submitted, it will be reviewed for approval, and you will receive an email telling you that your account is now active.
*Please note that username and passwords are case sensitive
This section explains how to create a username and password.
- If you already have an account, click on any tab on the top menu, and you will be asked to login before going to that webpage.
- If you do not have an account, click on the MyMapBio tab (click here to see image ) and fill out the required information.
- Once submitted, it will be submitted for review.
- When it gets approved, you will receive an email informing you that your account is active.
*Please note that username and passwords are case sensitive
If you need to modify your account, you can do so by clicking on the MyMapBio tab (click here to see image). If you are not logged in, you will be asked to login.
The following options are available:
- You can view your profile along with release and recovery data tied to it.
- You can edit your profile which will allow you to update information, such as phone numbers, email, addresses, etc. tied to your username.
- There is a Change Your Password option which will allow you to change your password (* please note this is case sensitive) and to recover your username.
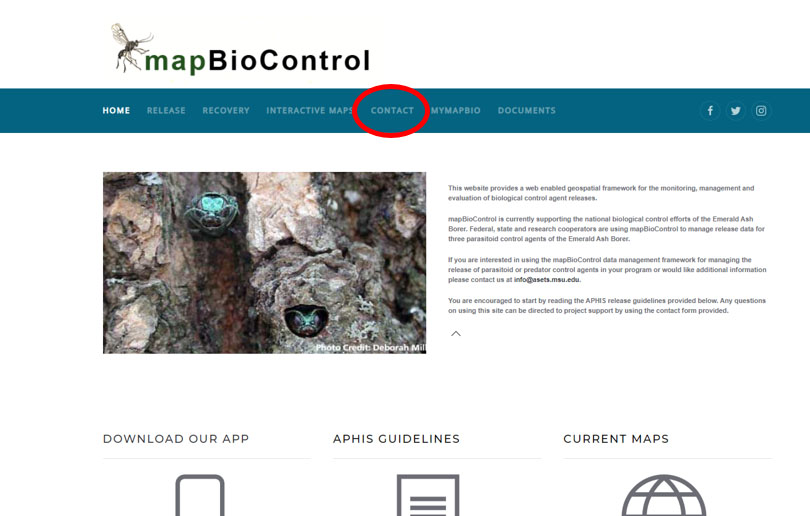
- Currently, on MapBioControl, there is not an option change your username. To do that you need to contact us using the Contact Form for assistance (click here to see image)
-
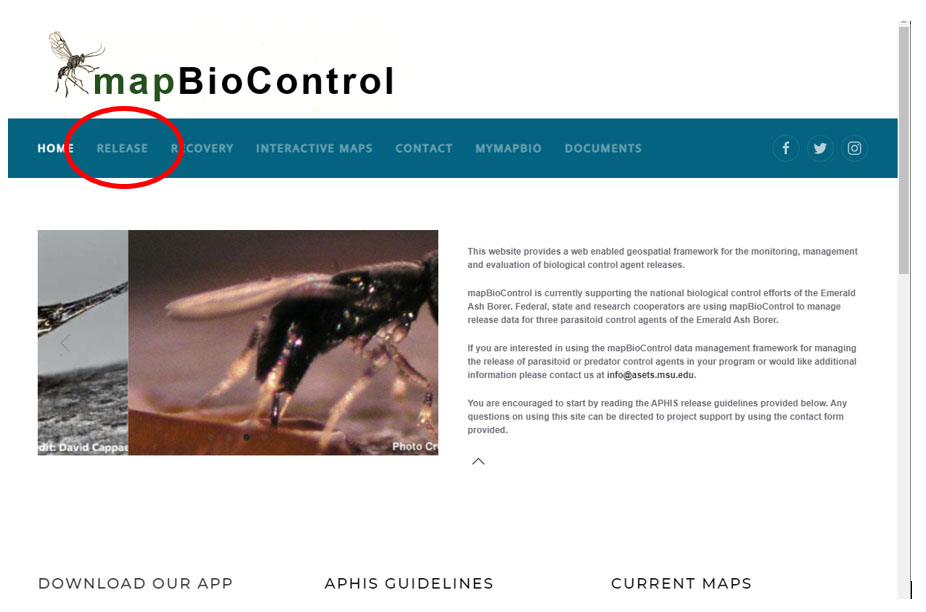
- Select the Release Tab ( click here to see image )
- It will display all the release sites that your account has access to, in a table format. If you were not logged in when you selected Release Tab , it will take you to the login section, and then it will take you to the Release Data section. If you are already logged in, it will go directly to the Release Data Section.
- The Release Tab displays a list of all data tied to your user account and user level so you will not see any data that does not belong to you.
- If you need to see other data or there is missing data tied to this account, please contact us and we can investigate the issue.
- This is a list of release sites that are both approved and proposed.
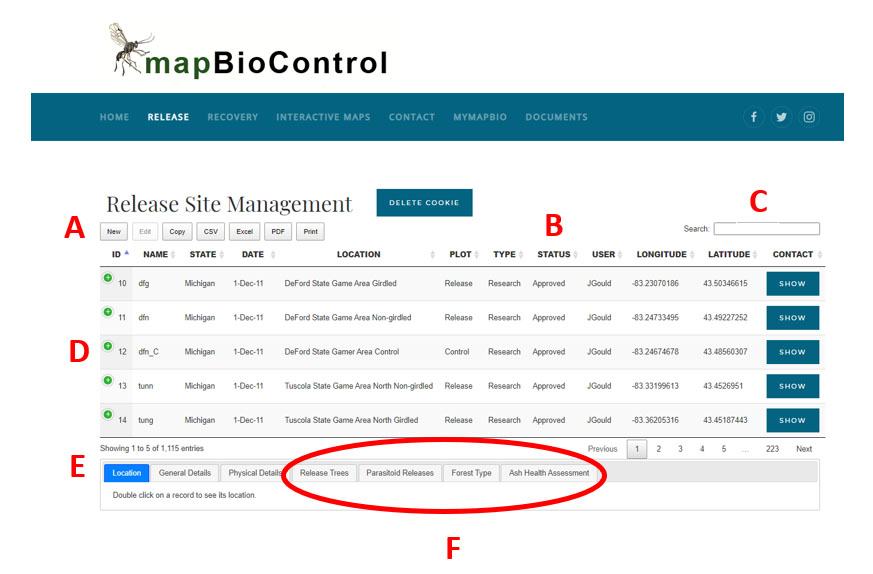
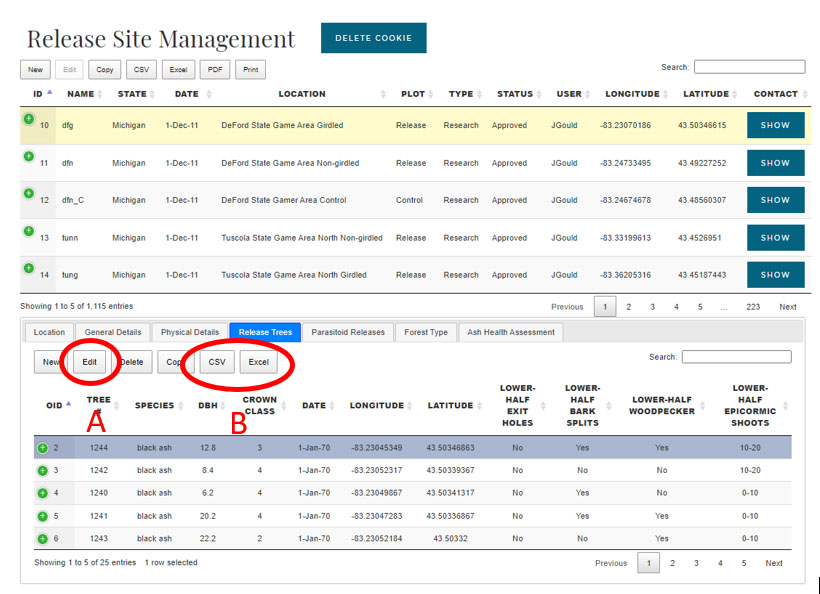
- The Release Tab page is broken down as follows: ( click here to see a map of each section). Below you can see the functionality of each of the six sections mapped on the graphic.
-
- This section has seven buttons with the following functionality:
-
- The New Button is to create a new release site (note the location information is required and you are limited to the states you have access to in your user profile),
- The Edit Button is to edit an existing release site so you can add or remove incorrect data.
- The Delete Button is not available to non-administrator accounts. If you are not an administrator, you won’t see it displayed.
- The CSV Button will download all records tied to your account to a CSV file,
- The Excel Button will download all records tied to your account to an excel file.
- we use WGS 84 for our latitude and longitude so please make sure when entering your release site location your coordinates are correct for your states as those that fall outside your assigned states will not be allowed in the system.
-
- This is where you can view information about release sites that are in your account, this is all data that can be edited (not location or user id data however). Note the status of your sites as they can either be approved (good to go by APHIS) or proposed (not reviewed by APHIS) and if in proposed you can not enter any further data for those sites until they are approved.
- Search bar lets you search your release sites by name, location, status, etc.
- These are the records that you will need to click on to view further information about them. If you wish to view one you will need to click on it, sometimes more than once it will be highlighted in yellow when selected.
- This is where you view the selected release site information with the following tabs:
-
- The Location Tab lets you look at the point you created with the latitude and longitude over satellite or street imagery.
- The General Details Tab is the optional general data you can enter when creating a new release site, (If you wish to edit this data there is an Edit Data Button in this tab)
- The Physical Details Tab button that lets you view the optional physical data you entered when creating a new release site. (If you wish to edit this data there is an Edit Data Button in this tab)
- to create any new data for a release site it must be an “approved” site, which is done through APHIS.
-
- This is where you go to create, edit, or export any of the following data:
-
- Release Trees
- latitude and longitude is required
-
- Parasitoid Releases
- This section has seven buttons with the following functionality:
- location is not required
-
- Forest Health
*Note:
-
- latitude and longitude is required
- Ash Health Assessment
*Note:
- latitude and longitude is required
All this data has its own constraints with various fields being required when creating new features. You can edit any of these by selecting a record (highlighted in blue) and click the Edit Tab (see section marked B here). You can also export all your records to a csv or excel (see section marked A here). Any data created in this manner will automatically grab the release site name, location, site id, and userid of the release site it is getting created under.
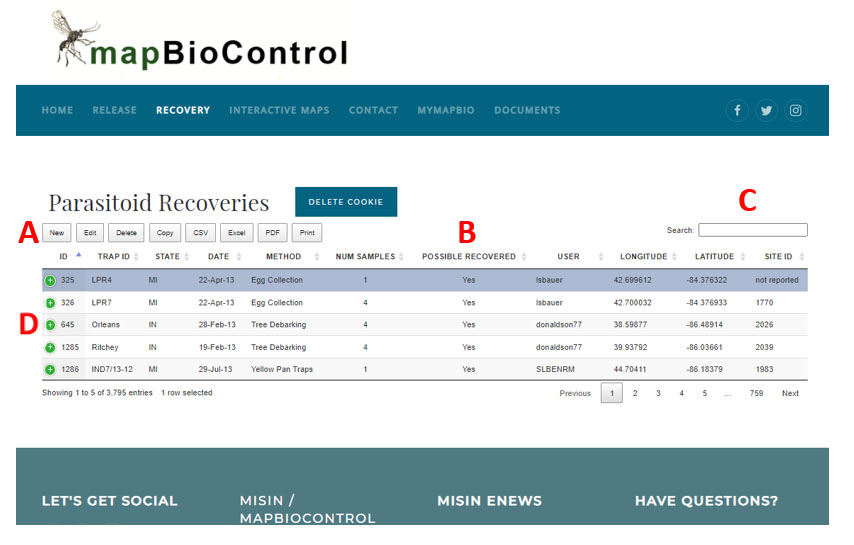
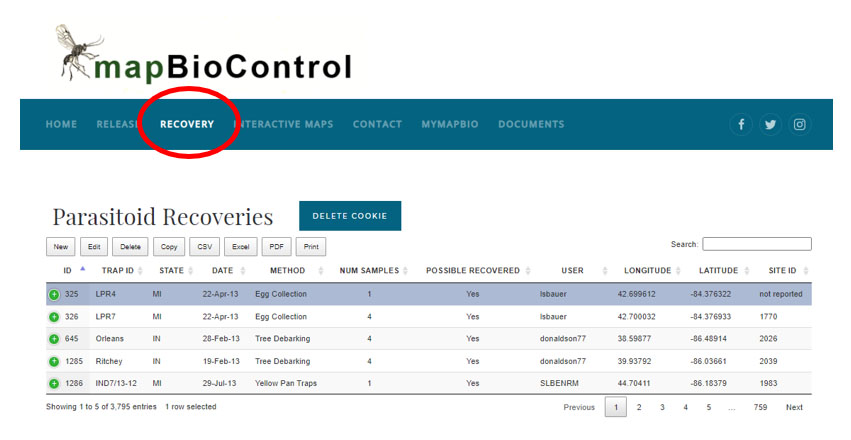
To enter recovery data, select the Recovery Tab ( see image here), after signing into your account. Once you click on that tab you will see a list of all the recovery data tied to your account.
Note that recovery data is not tied to specific release sites unless noted when creating a new recovery point.
Also, note there is some required information when creating a new parasitoid recovery such as location information and data sampled.
The Recovery Data page is broken down as follows: ( click here to see a map of each section).
Below you can see the functionality of each of the four sections mapped on the graphic
- This section has seven buttons with the following functionality:
-
- The New Button is to create a new parasitoid recovery point (note the location information is required and you are limited to the states you have access to in your user profile).
- The Edit Button is to edit an existing recovery so you can add or remove incorrect data.
- The Delete Button is not available to non-administrator accounts
- The CSV Button will download all records tied to your account to a csv file
- The Excel Button will download all records tied to your account to an excel file
- we use WGS 84 for our latitude and longitude so please make sure when entering your release site location your coordinates are correct for your states as those that fall outside your assigned states will not be allowed in the system.
-
- This is where you can view information about parasitoid recoveries that are in your account, this is all data that can be edited, with exception of location and user ID.
- Search bar lets you search your recoveries by trap id, location, state, etc.
- These are the records that you will need to click on to view further information about them. If you wish to view one you will need to click on it, sometimes more than once, it will be highlighted in blue when selected. If you wish to view a satellite or street map of this record, click on it again so that instead of being highlighted in blue it is highlighted in yellow. To view further information about your selected records, click the green plus symbol next to the ID.
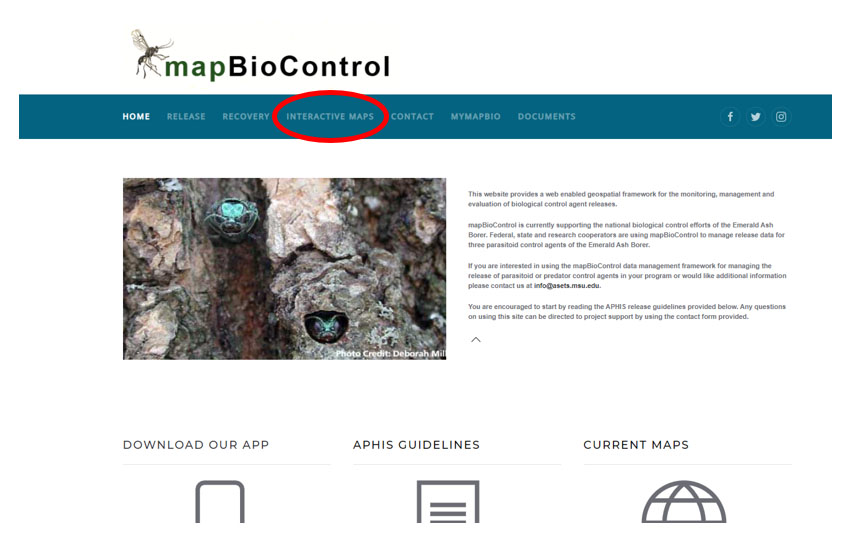
The Interactive Maps Tab ( see image here) provides access to two interactive mapservers
- A Release and Recovery Sites Server that can be used to view all the data (not just what is tied to your accoutn that we have in the database.) and an
- Emerald Ash Borer Known Infested Counties mapserver
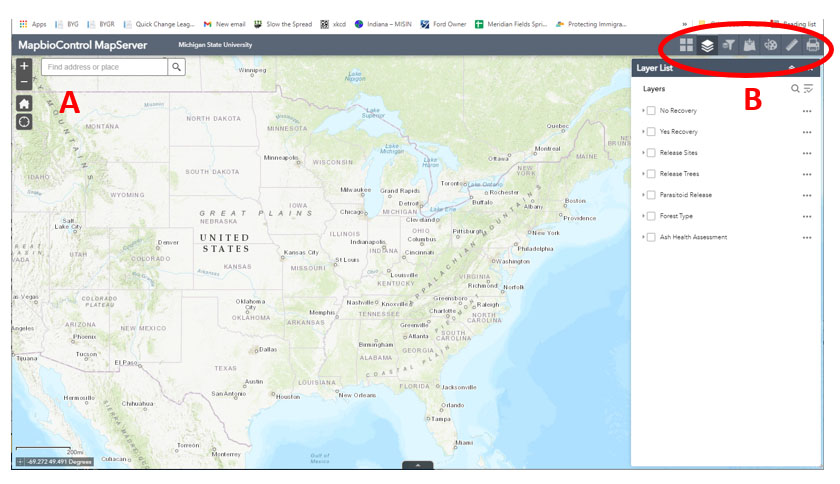
Some important tools on the Release and Recovery Sites Server: ( see image here)
- are explained below:
- These are the navigation buttons that do the following:
- Plus and Minus buttons zoom you in and out of the map
- The Home Button zooms you out of the default extent (All the United states)
- The Circle Button finds your location on the map (assuming you allow the browser to do so)
- The Search Bar lets you search for an address on the map
- This is where the widgets are for the mapserver and the Layers Widget is open by default, they do the following and are listed in order from left to right:
- The Basemap Widget lets you change the base layer of the mapserver
- The Layers Widget lets you turn layers on and off on the map
- The Filter Widget lets you filter the data by state
- The Add Data Widget lets you add data to the map that is not saved on our database (you can add local data, open data from ArcGIS online, or published services)
- The Draw Widget that lets you draw line, symbols, shapes, etc. on the map
- The Measure Widget that lets you measure distance, area, etc. in various forms of measurement and then a
- The Print Widget that prints out the map in pdf as seen with any layer turn on or off and any drawings or additional data you have put on the map
We generally try and answer these within a day or two, but sometimes can take longer if we are out doing field work, or it is the busy season.
If you have any additional problems or concerns, please fill out the contact form and we will try and address them.